THE gingersnap cookie recipe

Our holiday parties have always been well-attended. And while I know our friends want to see us and celebrate together, I know the real reason they show up. These cookies. My mom created this magical confection years ago. The original gingersnap recipe, from a behemoth 70’s cookbook, is so caked with gingersnap splatter that she usually calls me for the ratios. She was the one who thought about sandwiching them with a tangy cream cheese filling– and that was a revelation! The gingersnaps are baked to a light crispness, but soften as they absorb the frosting. The end result is a delightfully chewy cookie bursting with holiday spice. We always make these on the smaller size because you are getting a two-fer with the sandwich. And while the cookies are good without the frosting, it is just not the same, and it’s the holidays so cream cheese is pretty much required.

While we can’t all party together around the Christmas tree, I wanted to share this recipe as my gift to you. Feel free to text my cookie helpline if you need any guidance!

Happy Holidays!

Emily

Cookie Dough Ingredients

  • ¾ c. butter (softened)
  • 1 c. brown sugar
  • 1 egg
  • ¾ c. molasses
  • 2 ¼ c. flour
  • 2 t. baking soda
  • ½ t. salt
  • 1 ½ t. ground ginger
  • 1 t. cinnamon
  • ½ t. cloves
  • 3 T. granulated sugar- for rolling

Cream Cheese Filling Ingredients

  • 8 oz. cream cheese (softened)
  • 1/3 c. powdered sugar
  • 1 t. vanilla extract

Yield: 72 cookies/ 36 sandwiches
Time: 30 minutes for prep, 2 hrs-overnight chilling

Directions

Cream together butter, brown sugar, egg, and molasses until light and fluffy. Sift together the remaining ingredients and slowly add to the creamed mixture, mix until combined. Transfer dough to parchment paper or plastic wrap and chill in the fridge for at least two hours, but ideally overnight.

Preheat oven to 350 degrees. Roll 1-inch balls of dough (slightly smaller than a golf ball- they will spread thin as they bake!), roll in white sugar, place on cookie sheet and stamp with the back of the fork. Bake for 8 minutes. Since the dough is dark, you may not be able to tell from looking, but 8 minutes is usually the sweet spot in my oven. You can do a small batch at first to dial in the time for your oven!

Make the cream cheese filling by creaming together all of the ingredients until light and fluffy! Make your life easier and be sure that cream cheese is softened before starting.

Once the cookies are cooled, assemble the sandwiches by putting a blob of filling on the backside of a cookie (aim for about a 3/4 teaspoon per cookie, if you like your frosting thicc you may want to double the filling recipe!) and find the best size match to accompany it. You don’t need to fuss with trying to spread the filling out evenly, when you add the second cookie, it will spread to the edges.

Buffalo Chicken Sliders

dsc_0040

The sun is finally shining, the snow is receding and I can feel a twinkle of Spring in my bones. This winter has been a doozy. SO MUCH SNOW. I guess this is what we get for living in the mountains. It has been pretty, but I am not alone in saying, I am looking forward to a new season.

The cold outdoors made me grateful for our cozy indoor situation. Over the last few years Kyle and I have remodeled and redesigned most of our house. Little oddities fill the corners, treasures adorn the mantle and as the years go on we acquire new centerpieces. Last year we found the record player of our dreams- a vintage Zenith credenza. We found it at St. Vincent de Paul in Florence. Kyle came running up to me in a way that I knew meant he had found something good. And there it was, under piles of books and a lamp. We knew we had to have it. No power cord? No problem. It was priced at $60. Even if it didn’t work, that was still a deal. My brother-in-law had a 20% off coupon (because he is a treasure-seeker too, and a frequent flyer at St. Vinnies). I made my way to the front and told the checker we’d like it. I pulled out my coupon and she said, “Save the coupon, it’s 50% off today.”  It’s moments like this when you know, it’s meant to be.

When it made it’s way back to Bend (thanks to friends with a truck), we took a good look at it. It fit perfectly where we envisioned it. Kyle went to Ace and bought a new power cord, wired it and plugged it in. After a few seconds the vacuum tubes started to glow. It was magical. We put Neil Young on and, well, Neil sounded a little slooooooow. We scratched our heads, fiddled a bit and then the sound evened out and there it was. We listen to music a little differently now. No skipping, no continuous stream. We listen to albums the way the artists intended, and let me tell you, it’s something we could all benefit from. We all need a chance to slow down, and take life track by track.

dsc_0083

This recipe has nothing to do with any of that nonsense, but it’s tasty and easy. Sort of an un-recipe, recipe. If you have all the ingredients in front of you, I bet you’ll figure out what to do with them… Just in case, here is the play by play.

dsc_0046

Buffalo Chicken Sliders

Ingredients:

  • 1 pound chicken tenders
  • 1 tsp. better than bullion
  • 1 12 oz. bottle buffalo sauce (Franks)
  • 2 Tbl. butter
  • 4 oz. bleu cheese crumbles
  • 1/2 head of green cabbage
  • 3 Tbl. ranch or blue cheese dressing
  • pretzel buns
  1. Poach chicken. I do this by putting chicken in a medium sauce pan and covering wth water. I add a teaspoon of better than bullion to add a little flavor to the water. Cook over Medium heat (don’t boil, or it will get tough). Cook until you can stick a fork in a tender and it falls apart, about 15-20 minutes. Drain and set aside.
  2. Finely chop the cabbage and mix in a bowl with the dressing and most of the blue cheese (save a little top them with). If you want it creamier, add more dressing!
  3. Shred the chicken with two forks. Put back over medium-low heat and add the sauce and butter. Heat until the butter is melted and everything is happy.
  4. Cut the pretzel buns in half. Dab a bit of water on the top of the buns then sprinkle with flaked sea salt (because pretzel buns are just better this way). Toast in the oven until warm and a little crunchy.
  5. Put it all together! Heap on some chicken and cabbage mix, sprinkle the top with bleu cheese and enjoy!

Makes about 6 large sliders, double or triple the recipe if you are having a party!


Sagefight Roasted Chicken

dsc_0076

Living in the high desert oasis that is Bend, Oregon is a dream for most. Whether it’s the (reported) 300 days of sunshine, the never ending opportunities for adventure or just living in a nice, clean and beautiful town with a lot of delicious beer (22 breweries just in Bend). It is strange to think that we almost moved (to a big city with lots traffic, ahhh!). We had lived here together for about 2 years, working at jobs that weren’t fulfilling and overall lacked a sense of community.

We lucked out when we both scored new jobs right around the time we got married (1 month before and 1 week after, we were busy!). Our lack of attachment to our town quickly changed with these new opportunities. We both found ourselves in places that value us personally and professionally, get us excited and make us proud. Our friend circles grew and so did our love of place. I think it’s a testament that no matter where you live, if you spend 40+ hours a week doing something unfulfilling, you are not going to be a happy camper.

Beyond the mountains, lakes, rivers etc. Bend’s identity is firmly rooted in the brewery mecca that it is. My husband is now fortunate to call Deschutes Brewery his place of work. Being married to a brewer definitely has it’s perks, and lucky for me, I like beer! The thriving brewery culture does more than make beer. Most of the local breweries host events for local organizations, support local agriculture and give us many reasons to party! Even the non-profit work I do is supported by local breweries. And, of course, they make the best beer.

dsc_0031

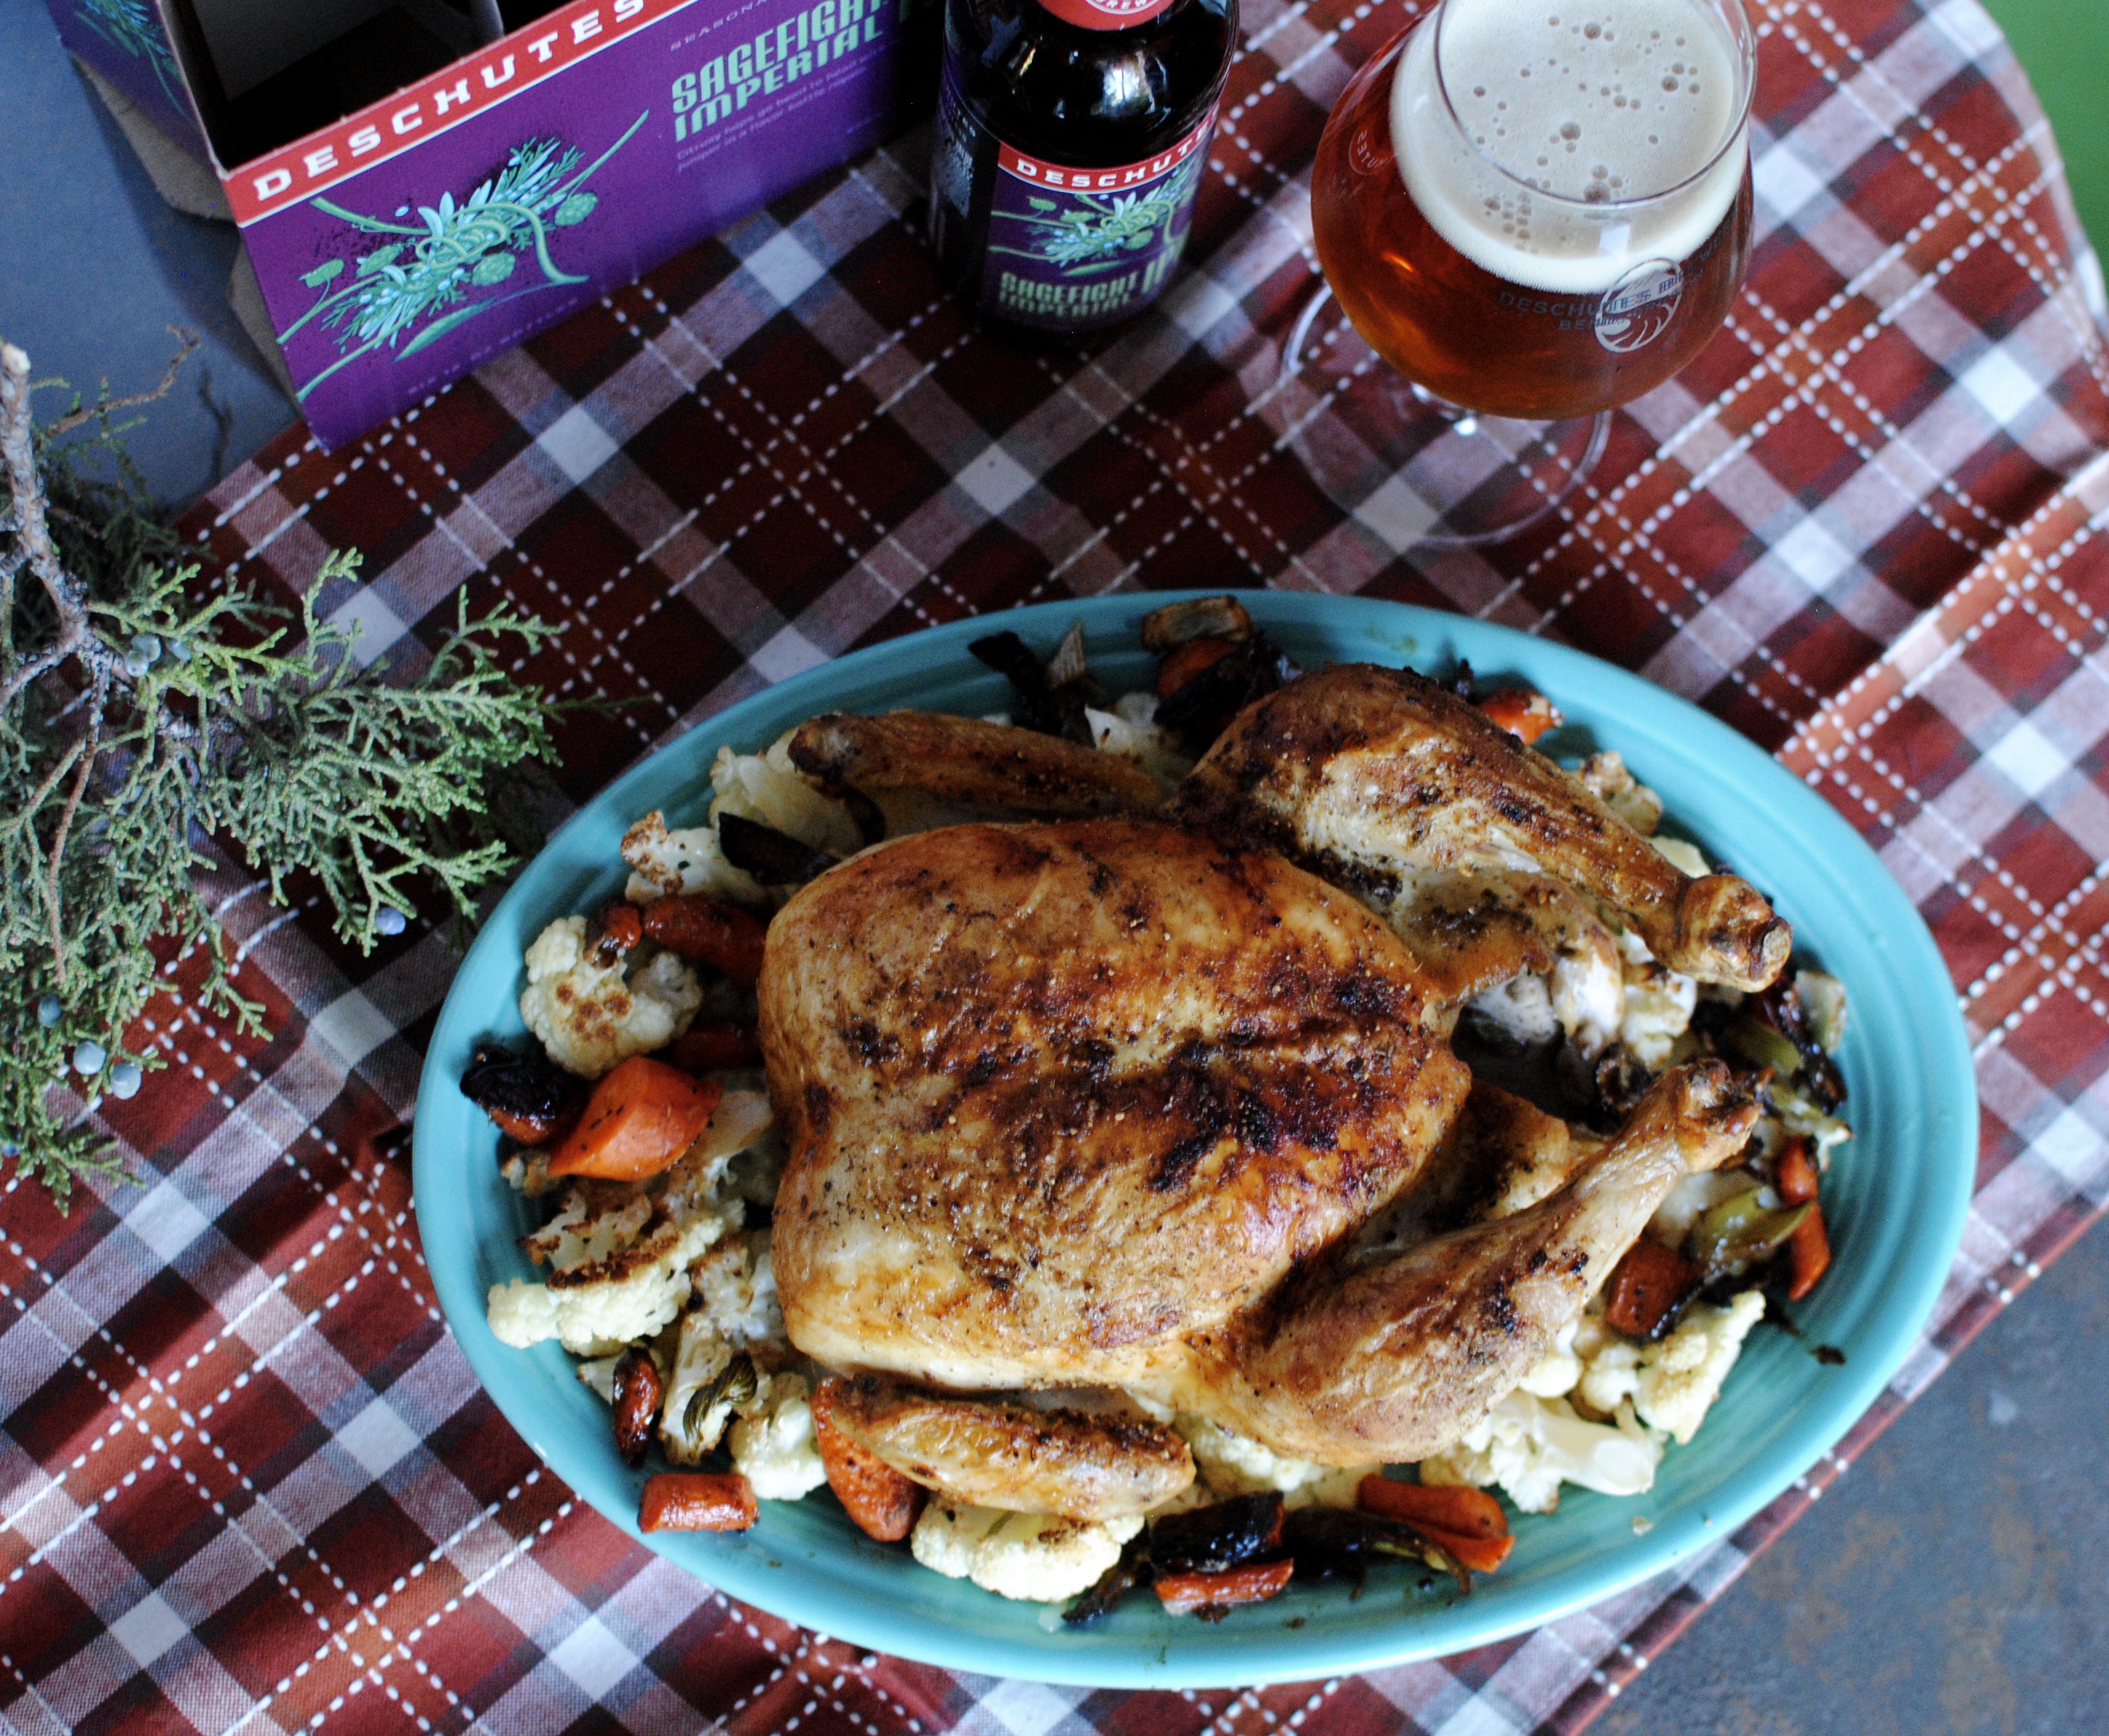
I was able to get my hands on some new brew from Deschutes (one of those perks I mentioned). It’s called Sagefight. This beer is totally Central Oregon. It is an Imperial (ie strong n’malty) IPA brewed with sage and juniper berries. Sage and juniper can be found all over our desert landscape. All the savory flavors of the beer gave me an idea. Let’s make some food with it! So we did. I give you Sagefight injected, sage and juniper berry rubbed, roasted chicken. And let me tell you, it’s a thing of beauty!  I haven’t made a lot of whole chickens, and to be honest was a little intimidated. It was much easier than I imagined, so don’t be afraid. The end result is a super juicy bird, with hints of sage, juniper and hops and a house filled with delicious aromas! Perfect for these increasingly chilly evenings.

Bringing people together over a good meal (and good beer) is one way that I feel at home. My hope in sharing recipes is much like my intentions with every meal I share with friends and family–bring together the people that make your place feel like home and make your hearts (and bellies) full.

Ingredients

  • 5-6 lb whole chicken
  • Kosher Salt
  • Black Pepper
  • 2 t. juniper berries (ground in a mortar and pestle)
  • 1 T. ground sage
  • 1/2 lemon (cut in 1/4s)
  • 6 cloves garlic, roughly chopped
  • 1 bunch of fresh thyme (if you have it- dried works too)
  • 2 T. melted butter
  • 1 large yellow onion
  • 4 carrots
  • 2 stocks celery
  • olive oil
  • 1/4 cup Sagefight IPA*

*Sagefight is optimal for this, but you could supplement with another IPA.

Special tools: injector and roasting pan

Instructions

  1. Heat oven to 425°.
  2. Roughly chop vegetables and toss with olive oil in the roasting pan. Put the rack over top.
  3. Remove chicken giblets (it’s gross, but only lasts a few seconds). Give the bird a rinse and pat the outside dry with a paper towel. Place on roasting rack over the pan.
  4. Salt and pepper the inside generously. Stuff the thyme, lemons and garlic inside.
  5. Inject with the beer! So, we happen to have a fancy injector. If you don’t, you can integrate the beer by deglazing the roasting pan with it while it roasts (let’s say, 30 minutes in and 60 minutes in).
  6. Mix 1 T of salt and 1 T pepper with the ground juniper berries and sage. Juniper berries aren’t common to have on hand. If you don’t want to buy them, supplement with some other herbs (thyme, rosemary etc.)
  7. Brush the outside with melted butter, sprinkle on the spice rub.
  8. You can tie the legs with kitchen string and tuck the wings back if that’s your preference.
  9. Now roast… Mine was about 5 lbs and took about 1 hr 15 minutes. The juices should run clear and the internal temperature of 165°. Let the chicken rest for at least 10 minutes before carving.
  10. The veggies in the pan are tasty to accompany, but can get a little salty from the drippings, so be aware. I roasted some cauliflower to go with the veggies. Potatoes would be great too!

dsc_0087

Peach Cobbler with Rosemary Cream Biscuits

Mmmm, it’s harvest time! It’s nearly impossible not to get in on the fresh fruit and vegetable action. We did our best to grow a bounty of vegetables in our backyard garden. Unfortunately, a host of unwelcome pests did their best to sabotage my green thumb aspirations. Still, we’ve enjoyed some tomatoes, green beans, lettuce and herbs to name a few.

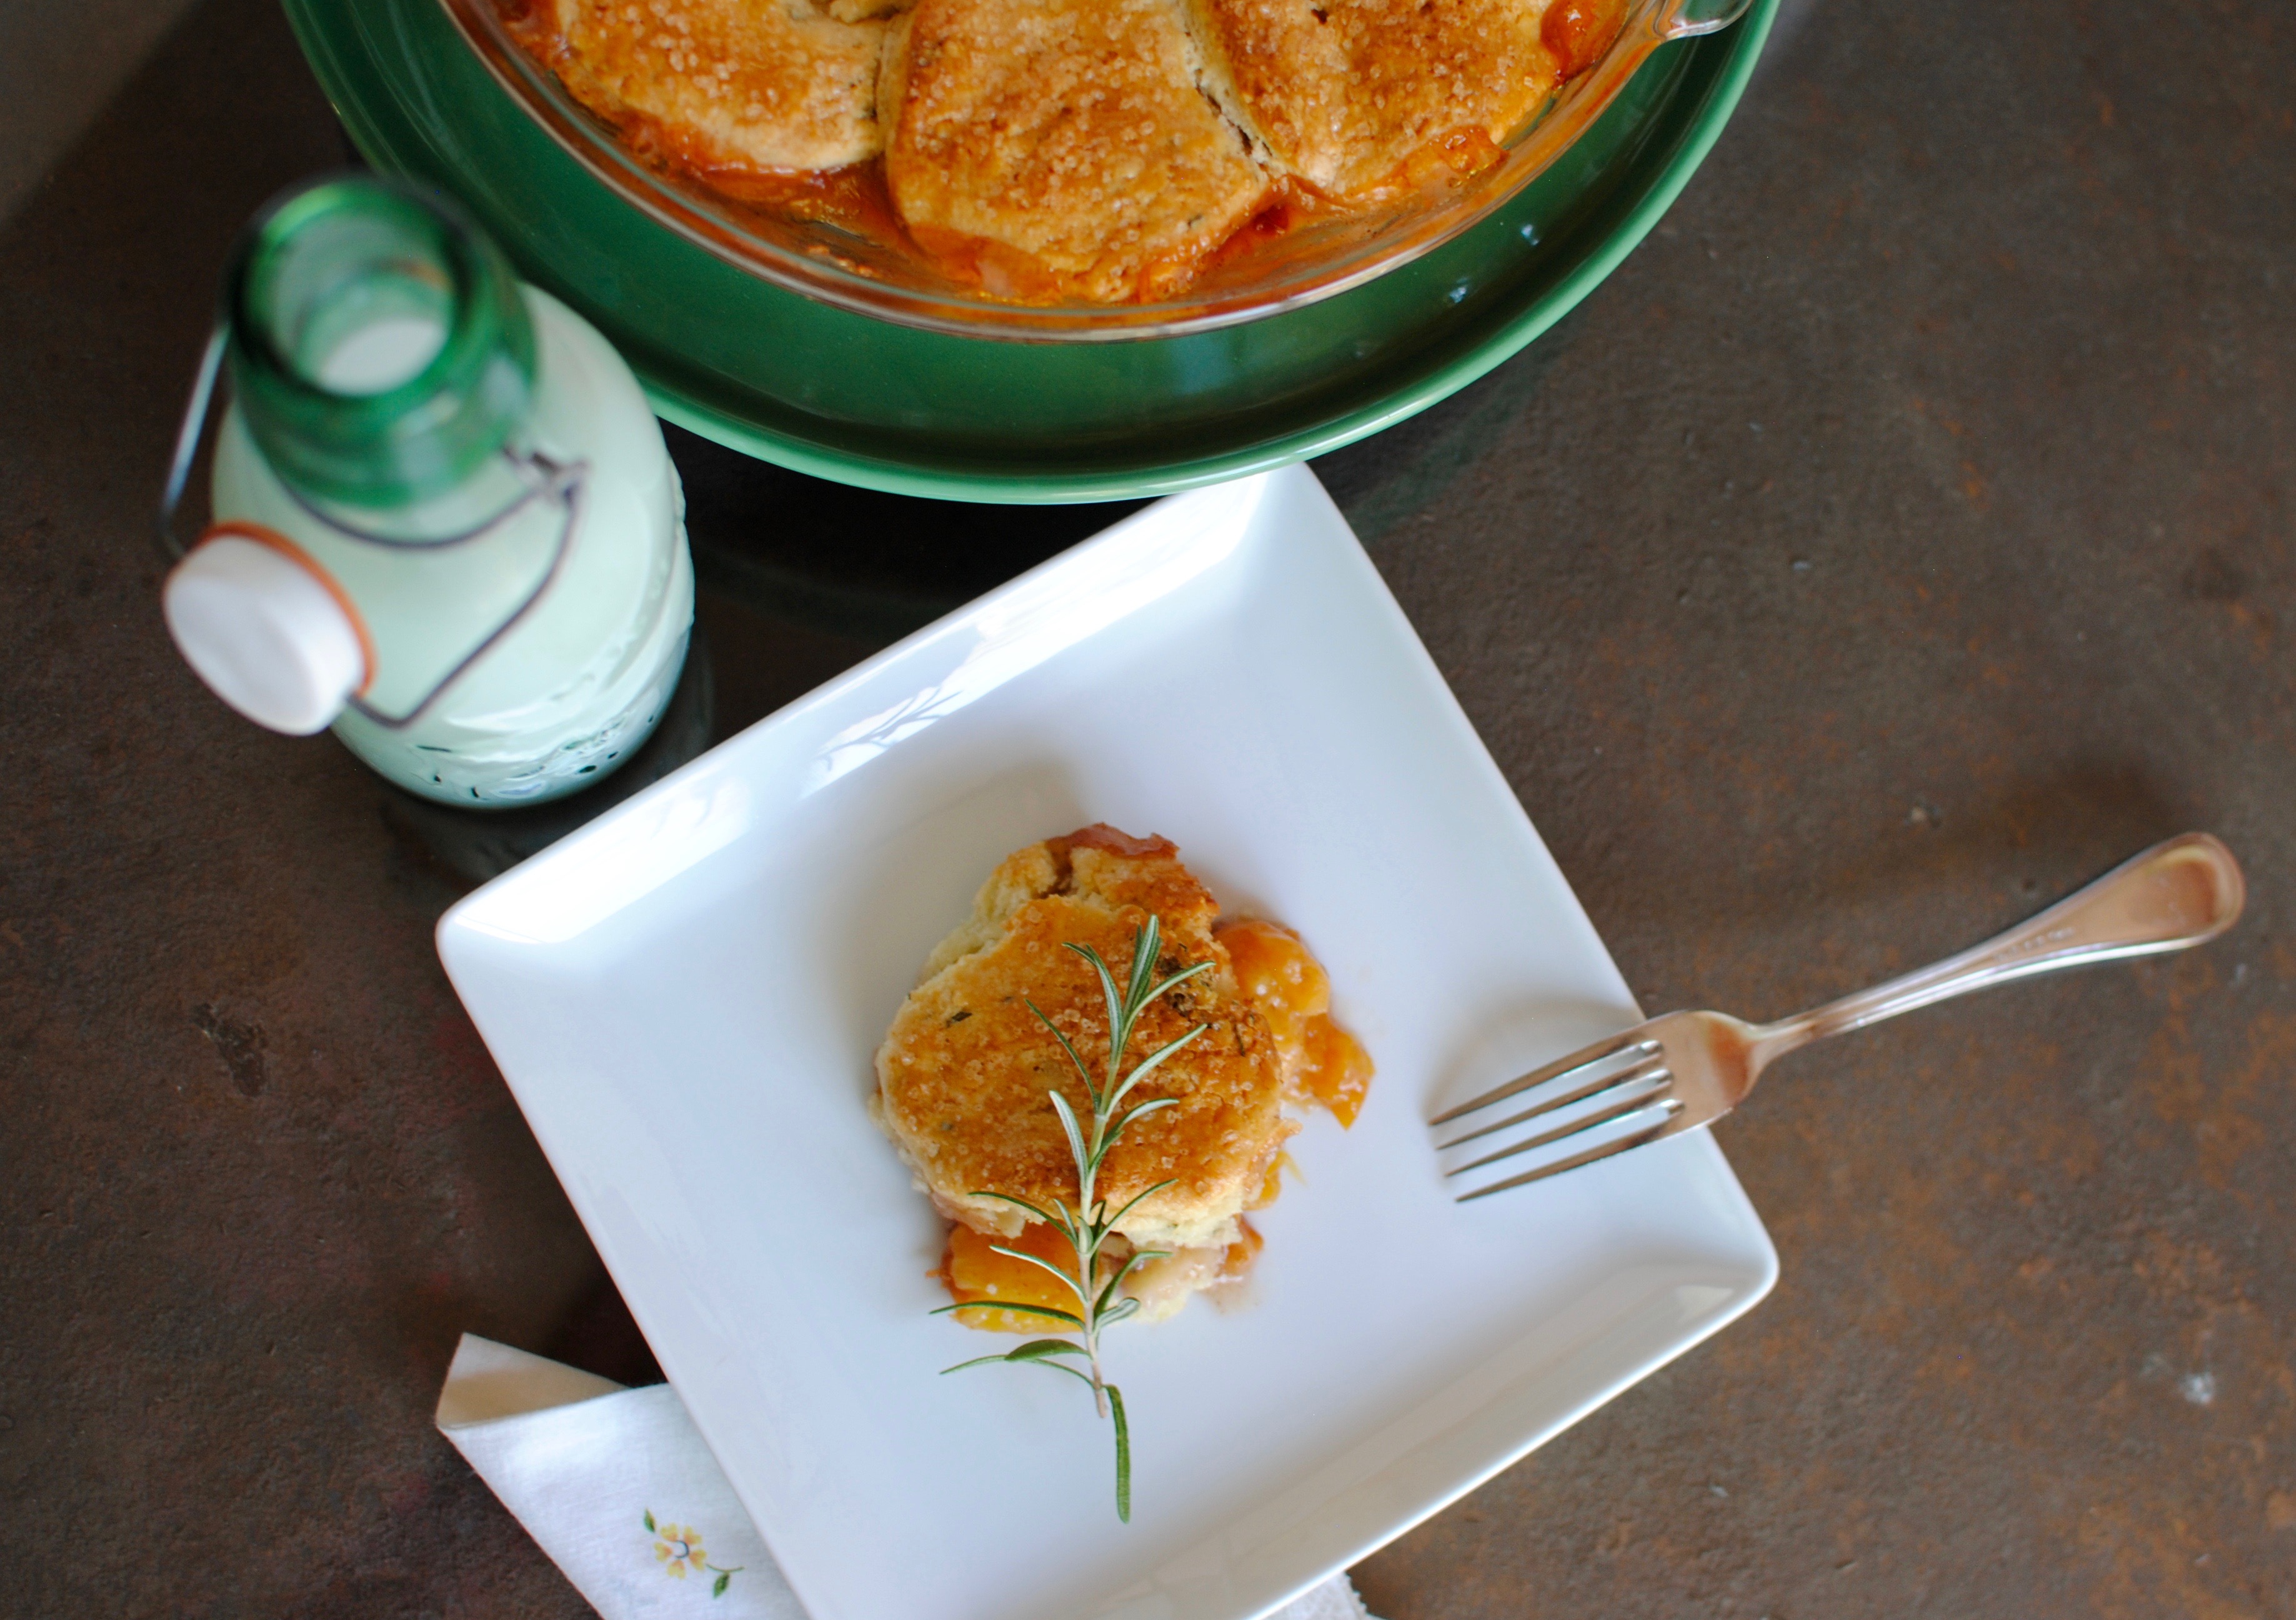
I have dreams of a farm. One in some mystical land that I could grow avocado, citrus, peach and pear trees (maybe all on one tree?!). I realize that growing much in the climate of Central Oregon is a pipe dream. Fortunately, just over the mountains lies an valley full of vegetables and fruits that get trucked over here. I scooped up some peaches at the farmer’s market and made a little cobbler, with a twist. I think the addition of rosemary adds a nice savory flavor. And that did come from my garden! The bourbon adds even more flavor, and sadly did not come from the garden, but wouldn’t it be amazing if it did?!

DSC_0026

DSC_0043

Ingredients

Filling

  • 3 large ripe peaches (thinly sliced)
  • 2 T. corn starch
  • 1/4 cup sugar
  • 1 T. brown sugar
  • 1/2 T. lemon juice
  • 2 T. bourbon (not optional)
  • 1/2 tsp. cinnamon

Biscuit Topping

  • 2 c. flour
  • 2 tsp. baking powder
  • 1/4 c. sugar
  • 1/2 cup cold butter (1 stick), cut into small pieces
  • 1 tsp. vanilla
  • 1 cup heavy cream plus 1 T. for brushing biscuits
  • 2 large sprigs of fresh rosemary (about 1 T.) chopped

Directions

  1. Preheat the oven to 375º.
  2. Mix together the sliced peaches, corn starch, sugar, brown sugar, lemon juice, bourbon and cinnamon. Set aside.
  3. Whisk the flour, baking powder and sugar together. Cut the butter into small pieces and then cut into the flour mixture (try to keep it cold). Add cream, vanilla and rosemary and mix (by hand) until a soft, sticky dough forms.
  4. Dust a cutting board with flour and turn the dough over and roll to a 1/4 inch thickness. Cut biscuit sized discs out (if you don’t have cutters, a cup works nicely).
  5. Pour peaches into a pie dish, lay biscuits over the top (slightly overlapping each one). Brush heavy cream on to each biscuit and sprinkle with sanding or turbinado sugar.
  6. Bake cobbler until the top is brown and peaches are bubbling. It should take about 45-60 minutes.

This is a dish to enjoy the day of baking or maybe the day after (let cool completely before covering). The moisture from the peaches will eventually make the biscuits less crisp.

DSC_0069

DSC_0059

Jubelale Pretzel & Chocolate Toffee

jubel

Do you ever have to do “icebreakers” when you are in meetings, trainings etc? It can be a tad uncomfortable and feel like a lot of pressure to come up with something personal to share with your co-workers or people you have never met before. Like, how am I really going to come up with 3 things that accurately describe who I am in the next 5 minutes!? Inevitably, I cycle through a mini panic attack that if I can’t come up with 3 cool things, I must not be that interesting. Which is somewhat true, but not worth the panic.

At a recent meeting we were asked what our favorite holiday traditions are. I immediately went to Christmas Eve, sitting criss-cross applesauce on the floor gathered around the coffee table with all my cousins. This is the Annual Christmas Eve Tea Party. A very illustrious event if you are under 12 (or 26, like myself). We all put on hats and adopt our alter-egos that hail from lands far, far away. The table is filled with little plates of goodies, a pot of “tea” (hot chocolate) and the big eyes of all the kiddos as they listen to Ms. Fluharty (cousin Meg) welcome them to the party. We share tales of our travels from the year and pass around the sweets. We end the party dancing a congo line parade through Aunt Betty Jo’s cozy house, as my mom and Jo pretend to play the player piano in grand fashion. They speed it up and we go wild and then they slide the tempo down and we move in slow motion.

I loved hearing how different and special each person’s traditions were to them. Even if they had long since done it, it brought a smile and ease to each person as they described their special thing. It was that cookie only made on Christmas or the handmade pajamas their Grandma made for them every year. It brought them to a happy time when all they needed to do was -to be-. I ended up feeling grateful for the opportunity to share because it gave me a chance to go there in my mind, wander back to those moments of pure joy and look forward to the next one. Next week the “season” begins. What traditions will you fulfill?

DSC_0096.JPG

Jubelale Pretzel Toffee

Ingredients:

Toffee

  • 1 cup sugar
  • 2 sticks butter
  • ½ cup Deschutes Jubelale*

Topping

  • 2 cups dark chocolate chips
  • 1 cup pretzels

*can substitute other malty, dark beer

How to:

  1. In a large heavy bottom saucepan, combine the butter, sugar and Jubelale. The volume will triple as it boils so it make sure you have a large enough saucepan. Cook over medium heat, stir until the butter is melted. While stirring occasionally, allow to come to a boil and cook until the temperature hits 285 degrees F. The color will be a dark amber. This takes about 15-20 minutes.
  2. Once it comes to temperature, pour onto a baking sheet lined with parchment paper (should cover a 15×10 inch baking pan). Let cool.
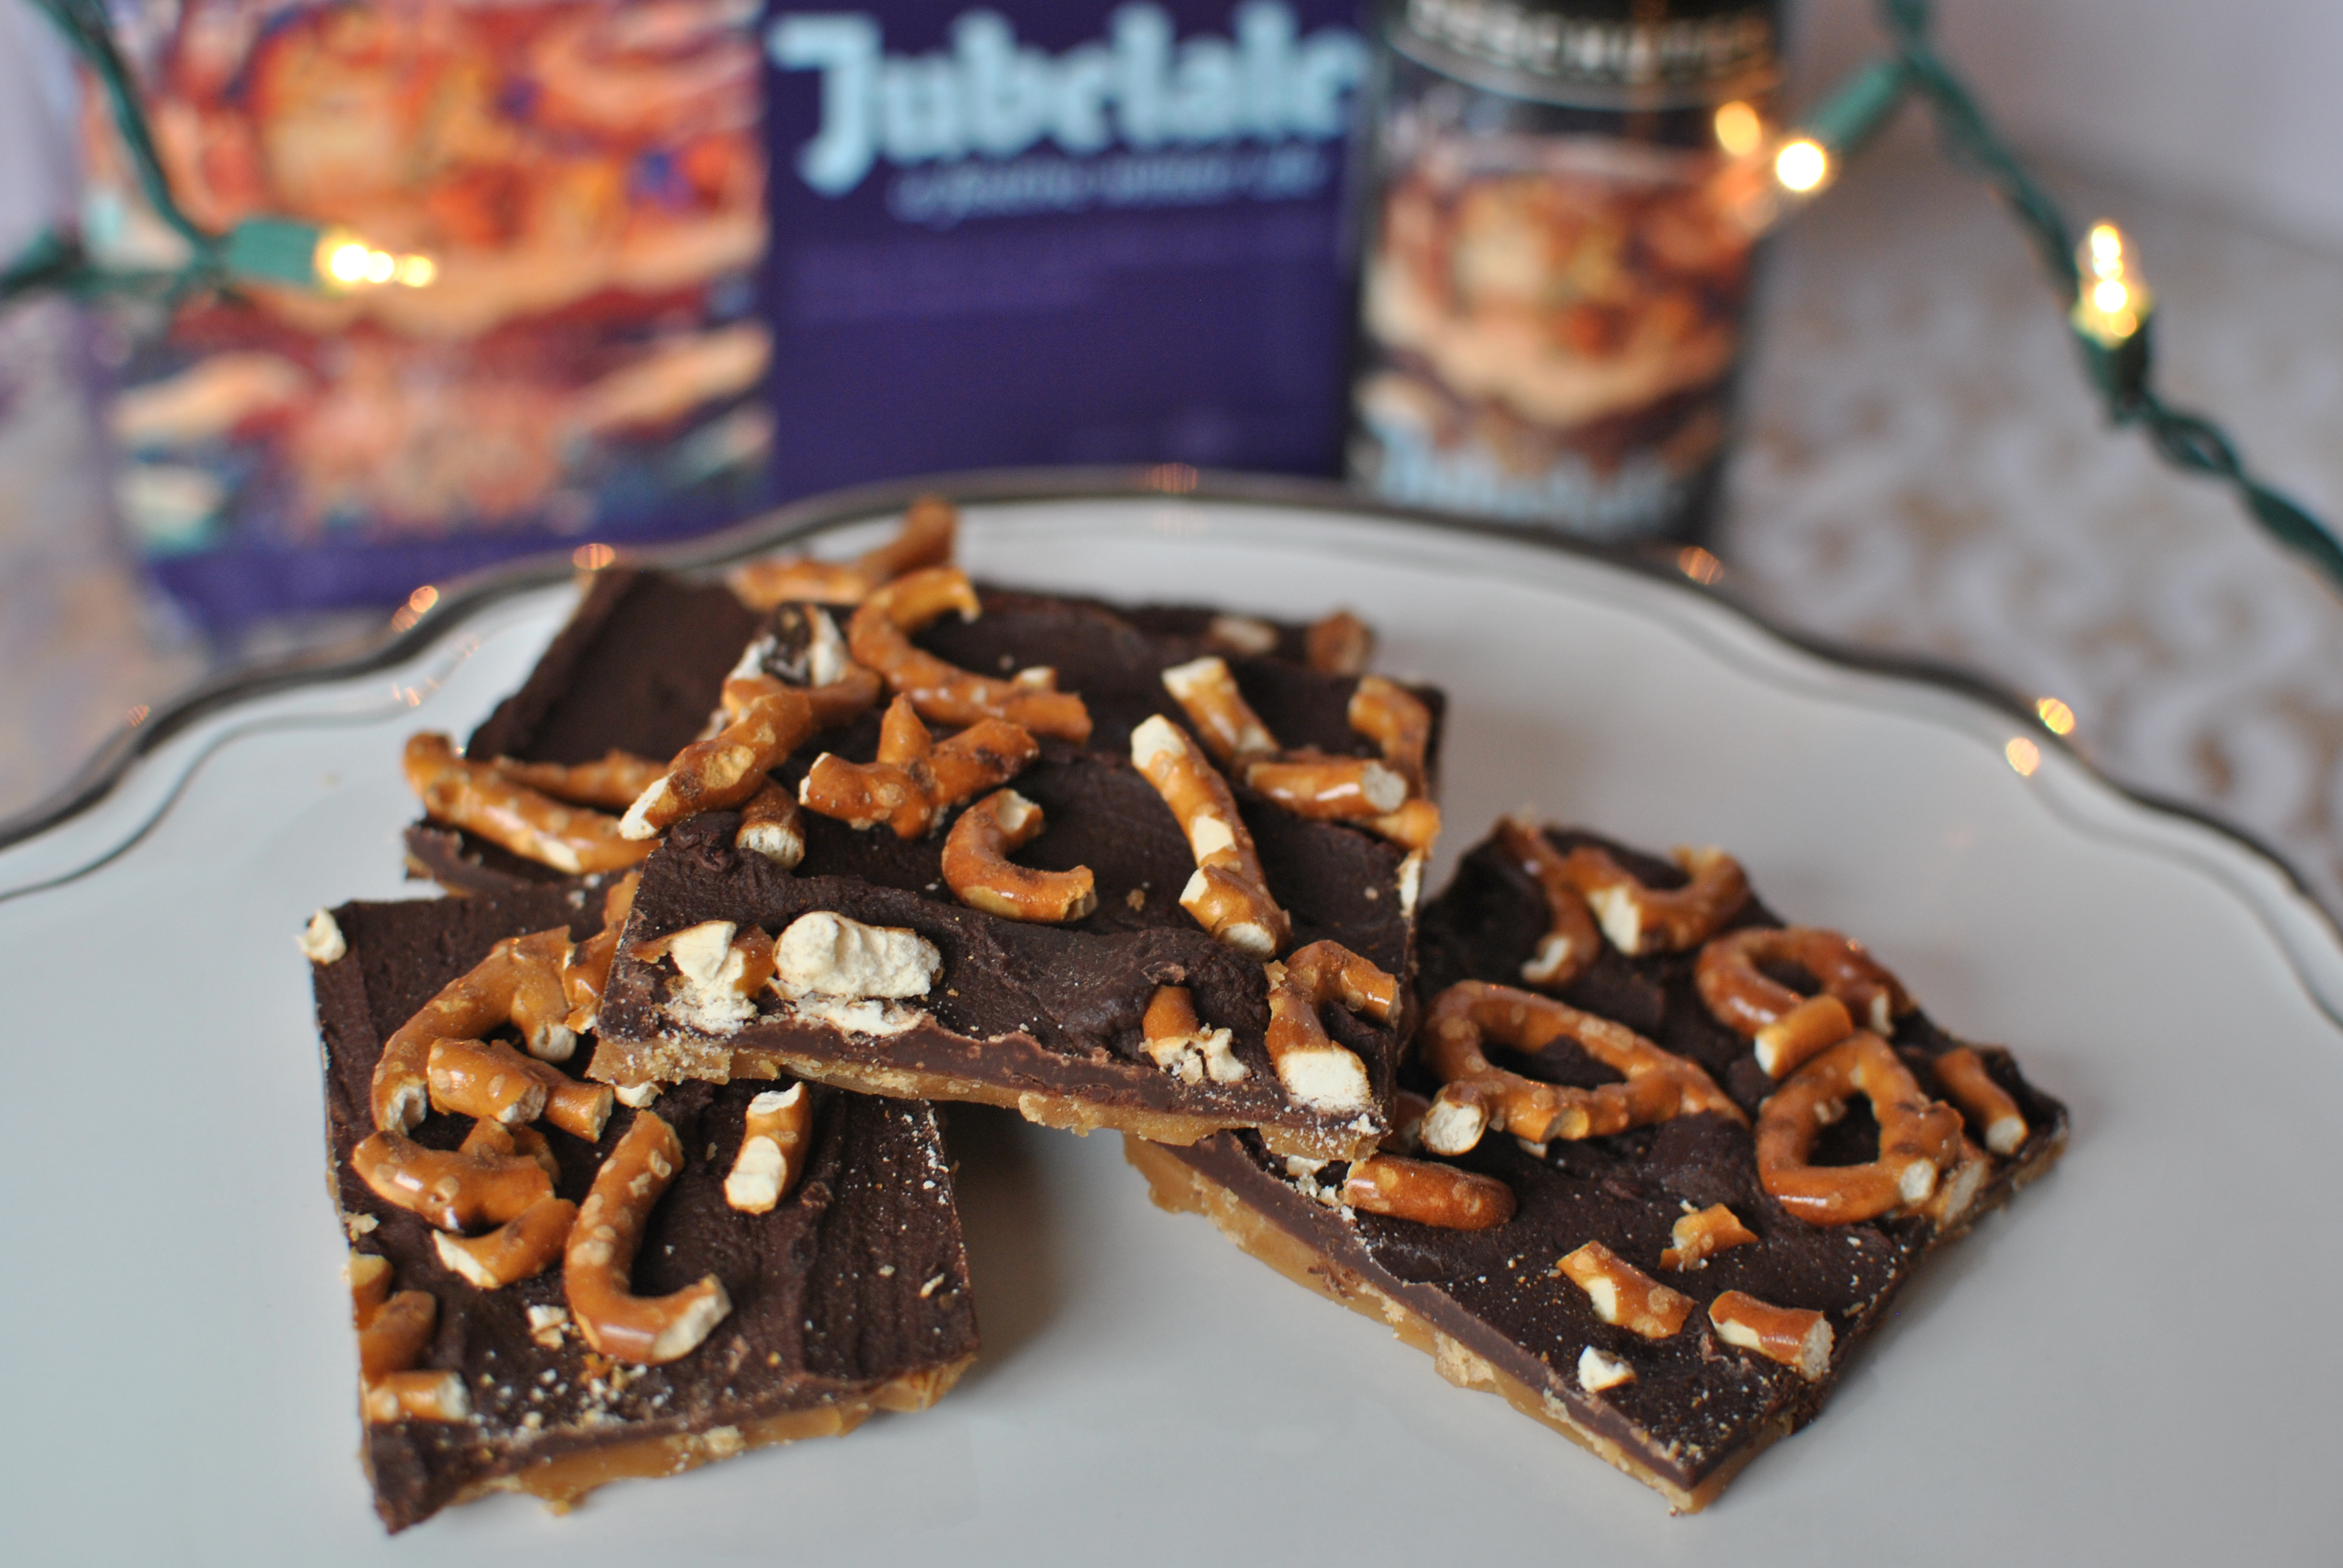
  3. While cooling, melt 2 cups of dark chocolate chips in a double boiler. Break up the pretzels. Once the toffee is cooled, cover with chocolate and evenly sprinkle the pretzels. Once set, cut into squares (but does have a mind of it’s own, so don’t expect perfection).

NOTES:

I had never made “candy” before this recipe and was so intimidated. Spend $5 and get a candy thermometer. It makes it so much easier!!! And with 5 ingredients, how hard could it be!?

This recipe could easily be doubled or tripled. It should last a few weeks in a sealed container, but doubtful it will need to since it is sooo good!

If you are not familiar, Jubelale is the winter ale from Deschutes Brewery. It is one of my favorites and described as “a robust ale with warming spice & notes of toffee, chicory & dried fruit.” Check out their suggestions for a beer inspired Thanksgiving here. This recipe is featured!

Each year a new label is created by a local artist. This year is my favorite in Jubelale history! It is magical and enchanting, just like all the art from Taylor Rose! Click here to check out her other amazing works of art.


Lemon Thumbprint Cookies

Life is punctuated by seasons. I think we all wake up and realize a change has happened; our tastes transition, our wardrobe adjusts and we are drawn in and out of the house. In some ways it makes me a little blue when I realize that a whole cycle of a year has passed. Fortunately, every season gives me something to look forward to. Coming out of a wet spring, I crave the summer heat. When I can’t take the sun (or mosquitos) any longer, I desire the cool winds of autumn. Then the first winter flurries arrive and I can’t wait to pull out the twinkly lights and cuddle by the fire. See how fast that went? That’s the part that makes me a little melancholy.

I can’t whine for too long, as the sun pours into my kitchen and I look at the vase of fluffy peonies on my table. Soon I will be snipping fresh greens and plucking radishes, carrots and beets from my garden. There are few things better than sitting outside, eating dinner next to the earth where it came from. Gardening has fascinated me since I was a child. Days after I put seeds in the ground and am pressing my nose to the dirt, waiting and watching for them to sprout. It is my favorite way to slow down and savor the season.

After all that garden talk, you probably expected a fabulous veggie recipe. Not today. This post is actually about another aspect of summer, wedding season! I have the honor and pleasure of making a heap of desserts for a couple of lovebirds (and 200 of their closest friends and family) in a few weeks. This is my take on a lemon bar in cookie form. Less messy and the feedback has been that they are better than their bar cousins… You can be the judge of that! I highly recommend making your own lemon curd. Cheaper and so much better than the store bought version.

DSC_0007

Lemon Curd

Ingredients

  • 3 lemons
  • 1/2 cup sugar
  • 1/4 c. butter (1/2 stick)
  • 4 eggs
  • 1/2 teaspoon salt

Directions

  1. Remove zest from the lemons with a vegetable peeler. Be careful not to take off the white pith (those are bitter). Juice those lemons in a separate bowl, set aside.
  2. Blend the zest with the sugar in a food processor until the zest is finely chopped.
  3. In a bowl, cream butter and add the sugar/ lemon mixture. Add eggs one at a time. Lastly, add the lemon juice and salt.
  4. Transfer mixture to a sauce pot. Cook over low, stirring frequently. After about 10 minutes you will notice it thickening up (should be at 170 with a candy thermometer). Take off the heat and transfer to jars and let cool. After a couple hours, it will be thicker (and freaking amazing)!

This makes about 24 oz. and could easily be doubled. The lemon curd will last a month in the fridge and would make cute gifts in little jelly jars.

DSC_0038

Lemon Thumbprint Cookies

Ingredients

  • 1 cup (2 sticks) unsalted butter, room temp
  • 1/2 cup sugar
  • 2 egg yolks
  • 1 Tablespoon lemon zest (grated with microplane or chopped finely)
  • 1/2 teaspoon salt
  • 2 1/2 cups flour
  • Lemon curd (recipe above)

Directions

  1. Heat oven to 350. Cream together butter and sugar until well blended and fluffy. Add in egg yolks, lemon juice & zest and salt.
  2. Beat in flour until the mixture is moistened. It is supposed to be crumbly, so don’t over mix.
  3. Form small balls (using your hands might be better than a cookie scoop, the dough is thick…). Space evenly on a cookie sheet. Grab something with a round shape, smaller than the cookie balls, to create the indentation (for the lemon curd). I used a back of my pestle, but a finger could work! A little flour will help minimize stickiness.
  4. Bake for 15-20 minutes, until golden on the bottom. Remove from oven and fill indentations with lemon curd. Return to the oven for 2 minutes for the lemon curd to set.
  5. Let cool and before serving, dust with a little powdered sugar. Makes about 30 cookies.

Variations: You could swap another kind of jam instead of the lemon curd. I think these would be fantastic with raspberry jam. For that, I’d skip the second trip to the oven.

I hope you enjoy these little lemon bites of heaven and are taking in all that the sunshine is providing you!

-Emily

DSC_0061

Tomatillo Salsa

DSC_0232

One of my favorite phrases in Spanish is “Por que no?”. Simply put, it means “why not?”. I used this phrase quite a bit when I studied abroad in Ecuador. To me it came to mean; don’t overthink it! Just go for it and enjoy the adventure of life. It seems like there are times when I need to apply this mentality to cooking. When I am working with an unfamiliar ingredient or a new recipe I do all my research, watch the ratios and am my own worst critic. But it seems like my most successful dishes come when I throw caution to the wind and let the ingredients “speak to me.”

This tomatillo salsa recipe has been perfected through that organic process. I simplified where I thought I could get away with it and what has come of it is a zesty, refreshing salsa. And it’s easy! I feel like I am always saying that, but seriously… So, say porque no? And venture to the tomatillo section at the grocery store and give this a whirl!

Buen Provecho!

Tomatillo Salsa

Ingredients

  • 1 lb tomatillos, husks removed
  • 1 yellow onion, cut in half
  • 1-2 jalepenos
  • 4 cloves of garlic
  • 1 lime
  • 1/2 bunch cilantro
  • salt

DSC_0220

  1. Pre-heat the grill to medium high. If you don’t have a grill, turn the oven on broil.
  2. While your grill is heating peel husks off of tomatillos (FYI: the tomatillo skin is a little sticky), cut the onion in half, try to keep the top intact so the onion stays together on the grill. Peel the garlic and make a little aluminum foil pouch with a drizzle of olive oil in it.
  3. DSC_0226Place tomatillos, onion, jalepenos and garlic pouch on grill. Grill on medium high, turning occasionally until everything has a good char on it. You will know the tomatillos are done when they lighten in color and juices start flowing out of them. Since everything cooks a little differently, expect to take things off in stages.
  4. Let your jalepenos cool a bit then scrape the skin off. And remove seeds if you don’t want it very spicy.
  5. In a food processor blend all the grilled items with the juice of one lime, a half a bunch of cilantro and a big pinch of salt.
  6. Let cool and serve with some delicious tortilla chips! Enjoy!

DSC_0231

Vegetable Korma & Grilled Tandoori Chicken

DSC_0110

In college my friends and I frequented an Indian buffet a couple blocks from campus. For a mere 6 bucks you could fill a Styrofoam box to max capacity and have food for at least 3 days. My friends always got creative– figuring out how to layer rice, naan, curries and tandoori in order to maximize space. I was laughed at the first time I went with them for putting salad in there. I quickly learned that salad was simply waste of space in this situation.

In addition to the college survivalism benefits, I found the aromas and flavors to be out of this world. A great thing about Indian food is that it does not skimp on spice! And a not so good thing is that a lot of restaurant Indian food tends to have a lot of cream and butter in it. Which although I have a special place for in my heart (wherever the cholesterol is stored), my belly does not always feel the same. Luckily, there are (easy) ways to make this delicious and aromatic food at home without feeling like your tummy is going to burst (tmi?). So this week you get TWO recipes, they can be made separately for a filling dinner or together for an Indian feast.

DSC_0105

Indian Spice Blend                                                                                                                          

With Indian food it all comes down to the spices. For the sake of time, you may want to blend together a big batch of spices that you will use as a base for these (2) recipes.

Here is what I did:

  • 1 T. tumeric
  • 1 T. cumin
  • 1T. Smoked paprika
  • 1 T. ground ginger
  • 1 T. salt
  • 1 T. pepper
  • 1 T. garam marsala
  • 1 T. coriander
  • 1 t. allspice
  • 1 t. clove
  • 1 t. cinnamon

 Vegetable Korma                                                                                                                        

Korma is basically a dish that consists of vegetables cooked in a spicy, cream sauce. You can really do whatever veggies you like. For mine I just used what I had on hand. If you change it up, remember some veggies cook faster than others. Without realizing it, I made this recipe VEGAN! So if you skip the chicken, this will make a very satisfying meatless meal. This makes a big batch (6-8 servings). I froze half the batch.

Ingredients

  • 1 TBL. Coconut oil
  • 2 large potatoes, peeled & diced
  • 1/2 lb green beans, ends cut off and cut in 1/3rds
  • 2 large carrots, cubed
  • 1 can garbanzo beans
  • 1 onion, diced
  • 2 cloves garlic, finely chopped
  • 2 inch of fresh ginger, finely chopped
  • 1 can coconut milk
  • 1 can stewed tomatoes
  • 1 small can tomato paste
  • 1 cup water
  • Big pinch of salt
  • 4 TBL. Indian spice blend
  • Handful of cilantro, chopped
  1. In a large stock pot over medium heat, sauté onion in coconut oil until translucent.
  2. Add the garlic, ginger and spice blend.
  3. Add potatoes, carrots, tomatoes and tomato paste and 1 cup of water (or just enough water to cover potatoes). On medium- high heat, cook until potatoes and carrots are almost tender (about 10 minutes).
  4. Add green beans and garbanzo beans and simmer until green beans are cooked.
  5. Turn heat down to low and stir in the coconut milk. Taste and see if it’s “spicy” enough for you. Adjust your seasonings, as you like! Serve over jasmine rice and garnish with fresh cilantro.

DSC_0111

Grilled Tandoori Chicken                                                                                                          

  This is a very tasty way to have chicken. The yogurt and lemon give it a lightness while keeping it super moist. The extra spices will give it a bit more color and spice. Side note; don’t expect the bright red tandoori you may be used to at the restaurants. This recipe is food coloring free!

  • 1 cup plain yogurt
  • Juice of 1 lemon
  • 3 TBL. Indian spice blend
  • 1 TBL. Smoked paprika
  • 1 TBL. Turmeric
  • 1 tsp. cayenne pepper
  •  6 chicken drumsticks
  • Slices of lemon for garnish
  1. Mix marinade ingredients until well blended. Coat chicken in marinade and cover with plastic wrap. Let marinate in the fridge for at least 1 hour, no longer than 12.
  2. Preheat your grill to medium- high. Grill chicken for about 30 minutes. Turn every few minutes until each side has a good char on it. Adjust heat down to medium and finish cooking, turning occasionally. If using a meat thermometer, you should be aiming for 165 internal temp. Serve with jasmine rice and vegetable korma.

Let me know what you think about these recipes and if you’d like to see more dinner ideas. I take requests! Maybe you can even come over to my house and taste test with me. -E

Almond & Orange Biscotti

DSC_0163

What I love about biscotti is that it requires you to sit down and enjoy it. It is no “grab and go” kind of treat– there are far too many crumbs for that! Biscotti is meant to be savored with a strong cup of coffee. Although I think it is technically in the cookie category, it is really it’s own variety for that reason. The other thing I love about biscotti is you can make it as simple or as extravagant as you want. Since I had intended these to be part of a balanced breakfast, I kept it pretty basic. I was going to dip them in chocolate (because, why not?), but when I shared them with my girls at work, they said they were just right. So here you have it, a simple, slightly sweet breakfast treat. Enjoy!

Almond & Orange Biscotti

Ingredients

  • 1/2 cup. butter, softened
  • 1 cup sugar
  • 3 eggs
  • 1 tsp. vanilla or almond extract (I prefer vanilla)
  • 2 cups flour
  • 2 tsp. baking powder
  • dash salt
  • 1/2 cup sliced almonds
  • 1 TBL orange zest
  • 2 teaspoons milk

How to:

  1. Cream butter and sugar until nice and fluffy. Add the eggs one at a time, incorporating after each addition. Beat in extract.
  2. In separate bowl combine the dry ingredients. Slowly add to the cream mixture and mix well. Stir in almonds and orange zest.
  3. Transfer to wax/ parchment paper and chill the dough for about an hour. This will make forming the logs easier!
  4. With extra flour on hand, divide the dough into two equal portions. Shape in about 12 in x 3 inch rectangles. Brush with milk and sprinkle with a bit of sugar.DSC_0024
  5. Bake at 375 for about 15 minutes or until golden brown and firm to the touch.
  6. Let cool for about 10 minutes and turn your oven down to 300. Transfer to your cutting board and slice diagonally with a serrated knife in about 1/2 inch pieces. Place cut side down on baking sheets.
  7. Bake for 10 minutes on each side or until firm and crunchy. The idea is to dry out the cookies, not get them too dark.

Tips: Cut logs slowly. I had a couple of slices that crumbled in half when I got a little too excited.

Change up the flavors! You can really add anything to the basic recipe.

DSC_0167

How to De-seed a Pomegranate

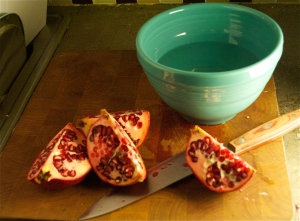
DSC_0104 It is already mid-December and it is definitely looking a lot like Christmas. Along with the cookies, the trees, the stockings etc. December brings the promise for another of my favorite things: fruit. Some of the best fruit is in season during the winter months. One of the most prized is the pomegranate. Just take a look at it- the ruby red seeds, interlocking in a juicy web. With a flavor that is a marriage of sweet and sour ending with a definitive crunch. The lore of the pomegranate is even more extensive than it’s intricate insides. From the “fruit of the dead” for the Ancient Greeks to the fertility of the promise land for Ancient Israelis, the symbolism of the fruit varies. It’s beauty and complex nature might scare people from buying one at the store. But getting those sparkling seeds out is easier than you might think. Below you will see my easy trick for getting the seeds out of the fruit and into your belly.

You will need:

  • Pomegranate
  • knife
  • cutting board
  • large bowl of water
  • strainer

Steps:

  1. Cut the pomegranate into 1/4s. There will be some juice lost.
  2. DSC_0108Over your bowl of water, use your fingers to pull back the white inner parts and separate the seeds. You will see that the white part floats to the top, while the seeds sink to the bottom.           DSC_0116
  3. Repeat the second step with the remaining pieces.
  4. Skim the white sections off the top with a small mesh strainer or your hands.
  5. Drain the water and enjoy!

DSC_0123

I eat these plain, on cereal, on salads etc. There are many dishes out there that you can integrate them into. Enjoy!

DSC_0005

My modern day Norman Rockwell pooch.